

The first attempt
Something that our team is exploring is the process of carbon fiber compression molding to make custom parts. Something that we have found successful racing programs must do to remain competitive is, continue learn. This learning process is important, it’s how you find that extra horsepower, reduce weight, become more efficient with the power you make, improve consistency, and make improvements to many other attributes that directly relate to the performance of your vehicle. To do this, a program must try new things, shall we call it research and design. This is the kick off article in our teams research and design effort. We will be discussing the process of carbon fiber compression molding.
In the racing industry you will find that many parts are custom made for either application or a particular car. Those custom parts can be very expensive, in an effort to reduce cost and compete with large budget programs we often take the build it ourself approach, this is no different. Composites have found a home in racing for their unique properties, they often offer strength with a weight advantage. The trade off here is cost, those parts are typically very expensive. Plus many of you will agree with my opinion here, they also look really cool. So naturally we want them on the car.
Let’s get into this process. We are doing what is called compression molding. We are going to design a part. Then create a mold with its negative and mold the part out of chopped carbon fiber and epoxy resin. This is a brand new process for us, we have never designed a mold for this type of work and we have not spec’d out resins and fiber for the actual product. In order to learn something and generate a successful part we are going to choose something that we feel is simple. Something we can see some success on and obtain some real data to advance future projects.
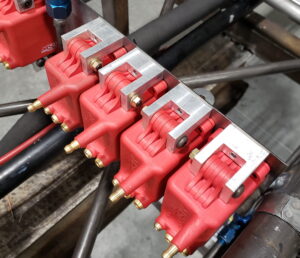
We are going to make the small bracket that hold on our ignition coils. This pc has limited features and is small enough that creating a mold is possible in a short amount of time with little resources.
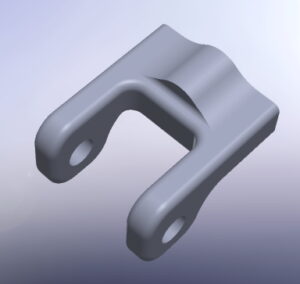
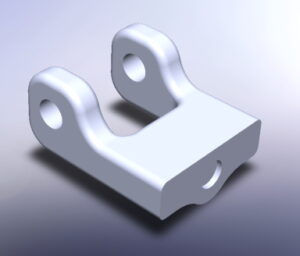
This bracket is not going to perform very well in a mold as is. It has tight corners that could lead to porosity and those sharp spots could lead to increased stress areas and cause the part to fail. So we did a little design work and developed a bracket that is smooth and also has an increased area for a threaded insert to be placed.
Now that we have a part designed that we want to produce, we now need to design a mold. Doing some research on mold design and using our experience in manufacturing we developed a 3 pc mold. In hopes that it would release the part, and still be re-useable. To produce the mold we used a 3D printer. The material of choice here is PETG, it offered increased strength over PLA and from what we could tell would play well with the epoxy.
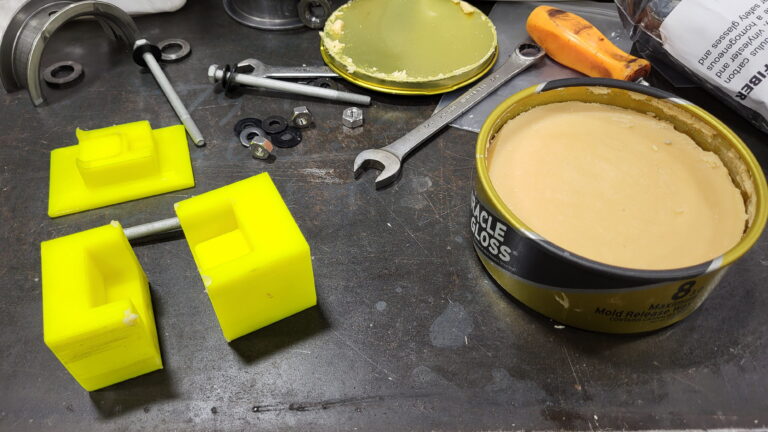
Now we have our part designed and mold made. It is time to choose our materials and pack the mold. We obtained our materials from Composite Envisions, we choose a chopped carbon fiber strand that was ¼ inch long, and for the Epoxy we choose their Infusion medium cure kit. We chose that epoxy because of its low viscosity and ability to wet through multiple layers. In an effort to help the part release from the mold we will be using a mold release was as well. (I will place links to the materials at the end of the article.)
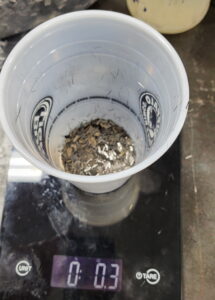
When filling the mold with fiber we decided to use a 60/40 ratio of fiber to epoxy. With 60% of the weight being carbon fiber. To do this we took the volume of the part in our case that is 9.4808 cubic cm and multiplied that by the density of our carbon fiber (this was found via simple internet search) which is 1.79 g/cm3 resulting in 16.97 grams of carbon fiber at 100% fill. We only want to use 60% of that so we will use 10.18 grams (0.395 oz) in the mold the remainder will be epoxy.
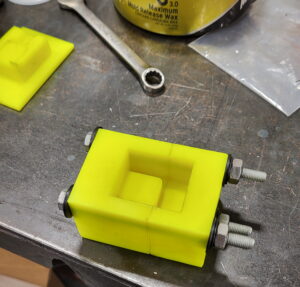
To make the part we prepared the surfaces of the mold by applying the mold release wax to the surfaces and assembled the two halves leaving the lid off. We then started by painting a thin layer of epoxy in the bottom of the mold, this was to ensure that the first layer of fiber was properly wetted. We then proceeded to fill the mold in layers, fiber then epoxy, more fiber and yet more epoxy. We continued this process until the we had all the fiber in the mold. During this process we didn’t measure the epoxy weight, we just filled the mold until the fiber was gone and put some epoxy on top to ensure we had enough to get all the fibers wet. The mold features a small hole that would allow excess epoxy to escape during the process.
After all the mold was filled the lid was placed on and clamped shut. We used a bar clamp, you can use anything that will apply a sufficient amount of pressure. Once the part was cured it was time to remove it from the mold…
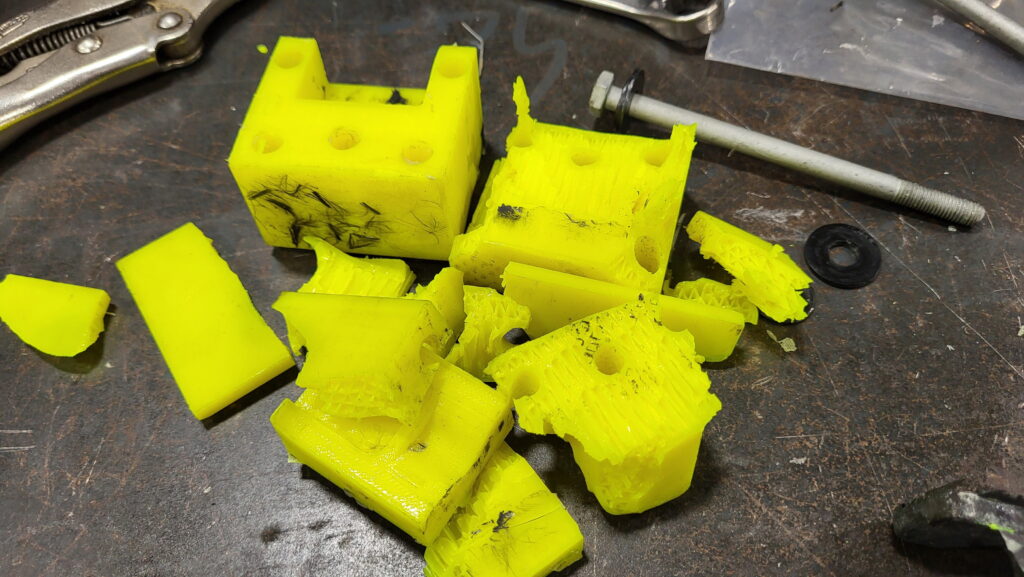
The mold didn’t make it through the removal process. Here we noticed some flaws in the design. The list of changes include:
- A better surface finish on the mold.
- Extended draft angle on the lid
- Increased the clearances to obtain a smoother lid insertion (we are going to add about 0.002)
- Add a removable center section that will reduce the amount of surface area contacting the fork of the bracket.
- Raise the landing that protrudes through the fork to remove the flashing that occurred in that area.
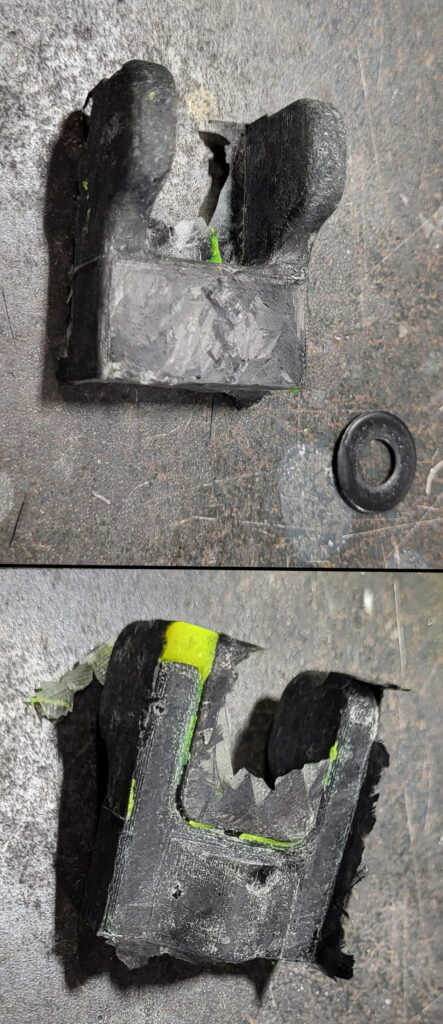
Here is the part directly out of the mold.
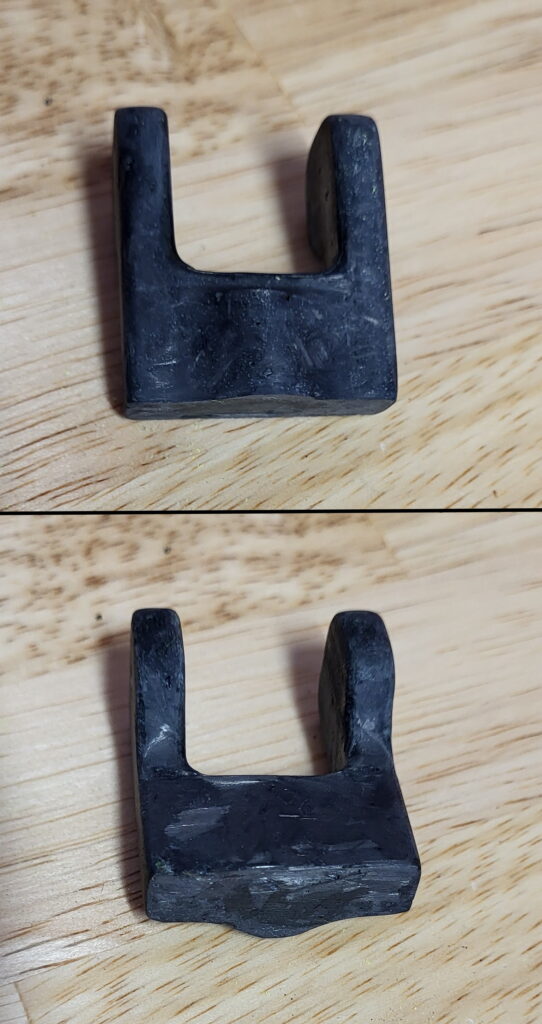
Here the part clean up with all the flashing removed.
Even though the mold didn’t make it through the process, it produces a good PC. Once the flashing was removed with a bit of sand paper the part looks really nice! Next on the journey is to design a new mold, make a few more prototypes, install some threaded inserts and begin testing and break a few of them and see how they perform!!
Even though the mold didn’t make it through the process, it produces a good PC. Once the flashing was removed with a bit of sand paper the part looks really nice! Next on the journey is to design a new mold, make a few more prototypes, install some threaded inserts and begin testing and break a few of them and see how they perform!!
Links to the molding materials: